1. VNC 접속을 위해 desktop sharing 설정이 필요합니다. 먼저 아래의 명령어를 입력하여 XML 파일을 편집기 vi로 읽어 들입니다.
sudo gedit /usr/share/glib-2.0/schemas/org.gnome.Vino.gschema.xml
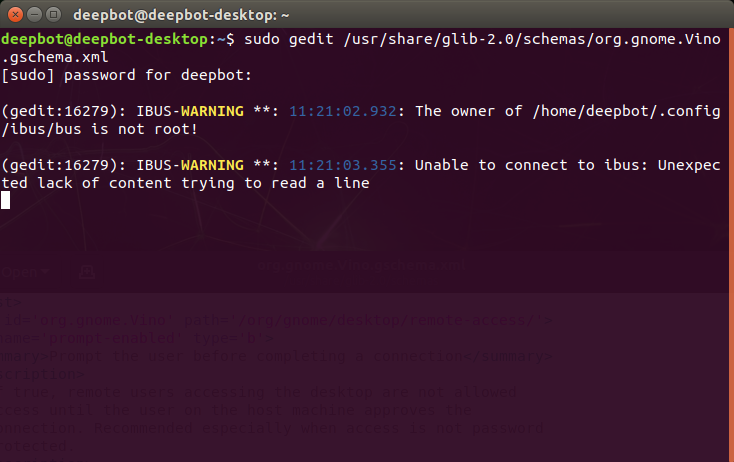
문서의 끝부분에 아래의 내용을 추가하고 저장합니다.
 <key name='enabled' type='b'>
      <summary>Enable remote access to the desktop</summary>
      <description>
        If true, allows remote access to the desktop via the RFB
        protocol. Users on remote machines may then connect to the
        desktop using a VNC viewer.
      </description>
      <default>false</default>
    </key>

2. 편집이 완료되면 glib-compile-schemas 명령어를 사용하여 Gnome schemas를 컴파일 합니다.
sudo glib-compile-schemas /usr/share/glib-2.0/schemas

아래의 명령을 한 줄 씩 복사하여 실행합니다.
gsettings set org.gnome.Vino require-encryption false
gsettings set org.gnome.Vino prompt-enabled false
/usr/lib/vino/vino-server

3. 설정(Settings) 아이콘을 클릭하고 검색창에서 desktop을 입력하여 Desktop Sharing 아이콘을 클릭합니다. Allow other users to view your desktop을 체크하고, You must confirm each access to this machine은 체크를 해제합니다. Require the user to enter this password를 체크하고 암호를 입력합니다.
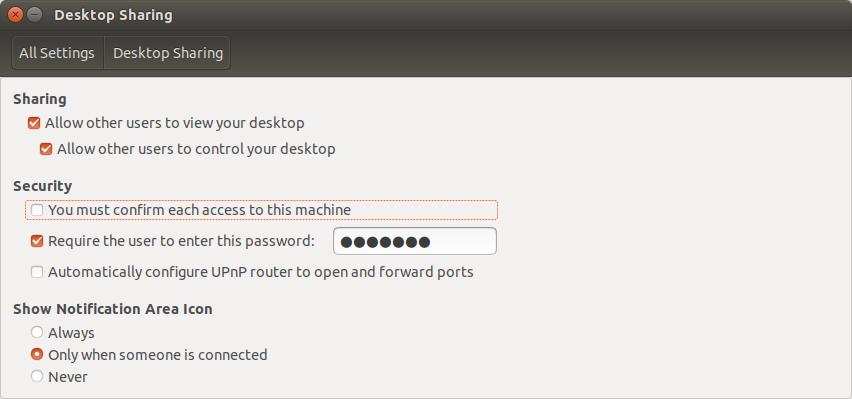
설정이 완료되면 창을 닫습니다.
4. 좌측 상단에 있는 Search your computer를 실행하고, start를 입력하여 Startup Applicationds 아이콘을 찾아 클릭하여 Startup Allications Preference 창을 실행합니다.
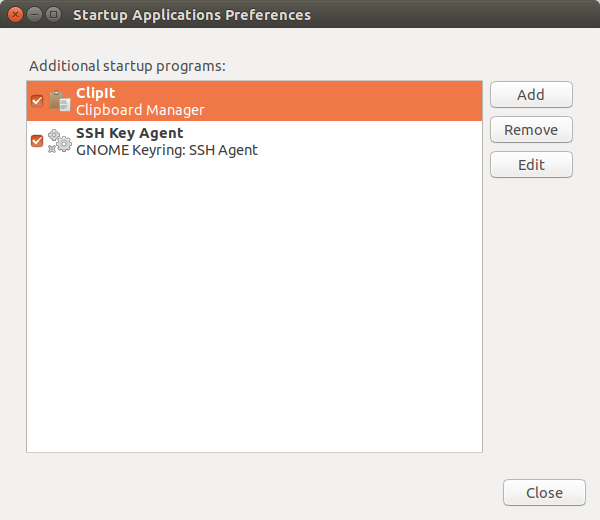
5. 우측 상단에 Add 버튼을 클릭하여 Add Startup Program 창을 실행합니다. 이 창에서 Name 입력 박스에 Vino을 입력하고, Command 창에 /usr/lib/vino/vino-server 를 입력합니다.

마지막으로 Comment 창에 VNC Server를 입력한 후 Add 버튼을 클릭하여 새로운 실행명령을 추가합니다.
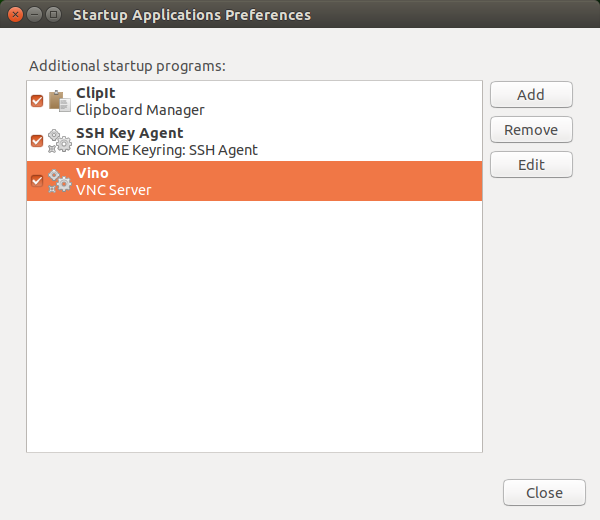
6. Close 버튼을 창을 다고, Reboot를 실행합니다.
'소프트웨어 > Jetson Nano' 카테고리의 다른 글
| Jetson Nano 보드 - Python 3.7 설치 (0) | 2020.11.18 |
|---|---|
| Jetson Nano 보드 - NoMachine 설치 (0) | 2020.11.14 |
| Jetson Nano 보드 - Fan PWM 제어 (0) | 2020.11.13 |
| Jetson Nano 보드 : Ubuntu 18.04(Jetpack 4.4)에서 한글 팩 설치 (0) | 2020.11.10 |
| Jetson Nano 보드에 Ubuntu 18.0 설치 (0) | 2020.11.09 |